12 Tips To Take A Beautiful Beach Photo
Coming from a Mediterranean country, the beach has always been a part of my life. Sea, sand, sun and sky – all these make for great beach photography.
Have a look at these 12 beach photography tips I have collected for you, and give it a go!

Sand dunes and shore on a clear day [Note: ExpertPhotography is supported by readers. Product links on ExpertPhotography are referral links. If you use one of these and buy something, we make a little bit of money. Need more info? See how it all works here.]
12. Avoid Crowds

The first thing is to find out what the busiest hours at the beach are and avoid them. In the area where I live, people usually go to the beach mid-morning. Sunrise and midday are less crowded. I prefer the sunrise, because of the golden light.
Keep in mind that if you take beach photography during midday hours, you’ll have hard light and undesirable shadows. Especially on people’s faces. Not to mention being out in the heat.
A beautiful beach landscape at sunset, with rocks in the foreground and a pink sky in the backgroundYou could also avoid crowds by going to less-visited beaches. This means you might need to travel a bit farther away. You’ll want to get away from parking areas and other facilities that attract people (bars, restaurants, etc.).
A dreamy photo of a bike resting against a wooden fence with the sea in the backgroundOne of the best beach photography tips is to shoot during the off-season. In winter, beaches have a different beauty and vibe than in the summer.
11. Include People in Beach Photography

Look for interesting people. I try to take photos where the people aren’t recognised, to respect their privacy.
Most of them will be in bathing suits (or even nude). And they won’t like the idea of having their photo taken, let alone shared on social media.
You can take photos from behind, from a distance, of a part of the body, or of silhouettes of people swimming or surfing. There are a lot of possibilities!
If you still want to take a recognisable portrait of a beautiful stranger as part of your beach photography, go for it. But first, ask them if they’re okay with being photographed.
10. Use Golden Hour for Beach Photography

You will recognise it by its typical yellow-orange light that gives it a magical appearance.
A close up photo of textured sandYou will also have long shadows that add texture to the sand. If you want to do backlight photography, the golden hour is also a great time for that.
9. Take Photos of Details for Unique Beach Images

This perspective shift will allow you to take totally different photos. Make sure to look for interesting stones, shells, footprints, sandcastles and so on.
A close up beach photo of a seashell on sandYou can also try to emphasise textures. Play with depth of field to get a dreamy effect (blurry background).
A close up photo of colourful rocks with bokeh effect of the waves in the background

8. Play With Shutter Speeds

This effect is great for photos of waves crashing and splashing against rocks.
A lone figure standing on rocks by the beach and staring into the waterOn the other hand, you can try long exposures for a soft silky effect in the water. For long exposure photography, you will need a tripod to avoid handshaking.
7. Keep Your Tripod Stable
Something that will improve, even your best beach photography is to know how to stabilise your tripod. Setting a tripod usually is quite a simple task, but setting it on a sandy ground and having it stay put in the sea breeze is not so easy.
The tripods have a very high centre of gravity and tiny tips to stand on. This means that they are prone to fall over if the wind is too strong.
Because the tripod’s legs have a minimal surface area where they touch the ground, they tend to sink in the sand, which decreases the stability.
To avoid this, add some weight to it. Bring an empty bag and fill it with sand. Close the bag and hang it from the tripod. You just got a tripod weight!
To stop the tripod from sinking in the sand, you can find stones and place them under the tripod, or you can bring old CDs from home and place them under the tips.
6. Try Family Beach Photography

I find that the beach is a great location for family photography. Kids can run and play in the sand, and usually, they love it! You will have the chance to take a lot of photos of happy kids!
The adults also get more playful at the beach than, for example, in a more urban environment or a photography studio.
It’s much more likely to get them to hug, kiss, run and play in the shoreline. If the weather is good, you can take photos playing or walking in the water.
If you stay in the shallow waters, you can also go in a little (protect your camera from water splashes!!) and take photos from this perspective. This is one of the best family beach photography tips possible.
5. Include Flowers

When you are at the beach, look for areas with vegetation to see if you can find flowers. They are usually seasonal, so if you want to catch them, you will need to take this into account and do some research.
You can do a photo shoot from the flower’s height (you will probably need to go down yourself) and take a medium shot or even a close-up. I like to include enough of the surroundings to show that the flower is on the beach.
But I use a narrow depth of field to get the background a little blurry so that it does not over dominate the photo.
flowers on the beachIf you are taking photos of flowers in the middle of the day, the hard light might cause a lot of hard shadows. You can avoid it by creating a bit of shadow for the flower.
Anything works: a parasol, using a piece of cloth or even using your body (or somebody else’s) to create a shadow that falls exactly on the flower and its surrounding.
Something really practical is to have a small foldable light diffuser in the camera for these occasions.
4. Use Flash

Using a flash is a great tip for taking beach pictures or portraits. There are two reasons why: when light is weaker (sunset and sunrise) and as filling light to avoid a lot of shadows in the face.
This happens especially when the sun is high in the sky and the light falls almost vertical. The eyebrows and nose of your model will create shadows in their face that are not flattering.
For open spaces like the beach, I’d recommend an external flash. They are more powerful. They will help beef up your beach photography settings in keeping the quality high. In addition, external flashes can usually rotate, so they allow you to bounce the light.
When using a flash, you need to avoid directing it straight at your model. It can be too bright and not flattering. Instead, you need to direct the flash to a surface that will redirect the light to your model. A classic is to bounce the flash from a ceiling or a wall.
At the beach, bouncing the flash’ light can be quite difficult because you don’t have a lot of available surfaces. In that case, you can use a flash diffuser.
There are a lot of types of diffusers, from small to quite big. The big ones are a bit hard to use when it is windy. You will lose stability because of the shaking produced by the wins hitting the diffuser.
For that reason, it is always good to have a small diffuser that you can use on windy days.
3. Use a Polarising Filter
Something that can help you improve your beach photography is to use a polarising filter. This fits in your lens (as the UV filters) and reduces the reflected light that makes photos lose contrast and colour intensity.
On the beach, there is a lot of this reflected light, especially from the sea. Once this filter is attached to your lens, you adjust its position by rotating the external ring until the reflected light disappears.
You can recognise this moment because the colors of the water become much more intense.

A photo of the sea shore shot without a polarizer filter.
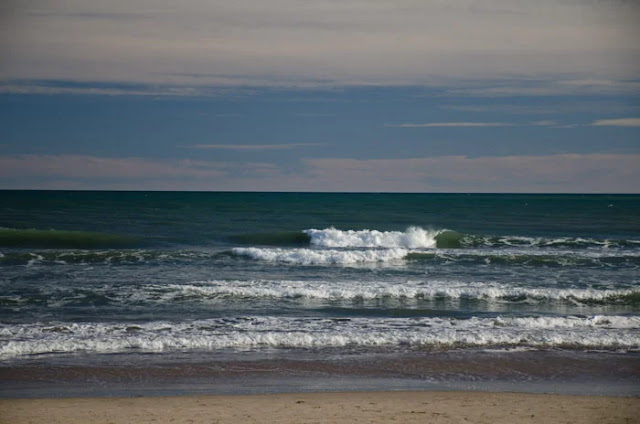
Photo of waves at the seashore shot using a polariser filter.
Also straight from the camera, but this time I used a polarising filter. As you can see, the colours are much more intense and it is slightly darker too.
The only problem with a polarising filter is that, since it takes the light out, it makes the scene look darker. Take this into account and check your digital camera settings to make sure you take a well-exposed image.
2. Create Silhouettes

You can try different things to get different effects. The most dramatic one is creating silhouettes. You need to place your subject between your camera and the light source, in this case, the sun.
Then you set the exposure according to the lighter part of the scene (the background). The subject will then remain dark, creating a silhouette effect.
A couple walking on the beach at sunset.You can also adjust the exposure to lighten your subject a little and bring back some details. Play and get creative by trying different darkness intensities.
A couple walking on the beach at sunset.
1. Play With White Balance
The colours of a scene have a significant role in its mood. We associate warm colours with happiness, joy, optimism. Cold colours are related to calm, even sad feelings.
You can play with the colours of your image in order to get the mood you want. Many post-processing software has an option for doing so.
For example, Lightroom has a slide called “Temperature” in its Develop module.
Sliding right or left you can make the colours of the whole photo warmer or cooler.
A picture of a beach with waves breaking on the shoreUsing Adobe lightroom for post processing beach photographyScreenshot of using Adobe lightroom for post processing a seascape photoA screenshot of using Adobe lightroom for post processing beach photography
Common Questions
What Settings Should I Use for Beach Photography?
Beaches are usually quite bright. So, keep the ISO low, around 100 or 200. Have a large f-stop number between f/8 and f/18 so the entire beach is in focus. This will also reduce the brightness. With these settings, you can play with the shutter speed. If you want to show smooth waves, then you can try a long shutter speed. Or you can keep it traditional with a fast shutter speed.
But, if you are taking a photo of a particular subject and want to focus on them, you should reduce the f-stop. This will put them in focus and slightly blur the background. This might make the picture bright, so opt for a fast shutter speed.
Which Lens is Best for Beach Photography?
This depends on what is your subject. If you are shooting landscapes, a wide-angle lens is best. A wide-angle lens with a focal length between 17-40mm works great. If you are taking portraits on the beach, then a 50mm or an 85mm portrait lens can have very small f-stop numbers with narrow depths of field.
How Do You Take Beach Pictures at Sunset?
Because there is less light during a sunset, you will need to use slow shutter speeds. Shoot in RAW so that you can bring back some of the detail in the shadows during post-processing. You can also take 3 pictures with different exposures and merge them together to create an HDR image in post-processing. This way your photo will have a gorgeous range of visible details.
Conclusion
The great thing about beach photography is that you can approach it from a lot of different ways. Depending on the time of the day or the season, the same beach will look totally different.
You can play with different shutter speeds to freeze the scene, or you can do some long exposure to make water and clouds look silky. You can take great photos during the golden hour, and take advantage of the backlight. And you can do landscape, portrait and nature photography!
There is always something interesting to shoot at the beach! You can also learn more about landscape photography with our course.
For more great tips, why not check out our article on underwater photography basics or great tips for photographing cliffs and coastlines!


Comments
Post a Comment